Beachgrid Email
Getting started with Beachgrid email
This is a step-by-step guide to sending your first campaign with our email marketing tool. Follow the instructions on this page to login, create, test, send and view reports for a regular campaign.
 LOGIN TO YOUR ACCOUNT
First, you will receive an email inviting you to use our email campaign software.
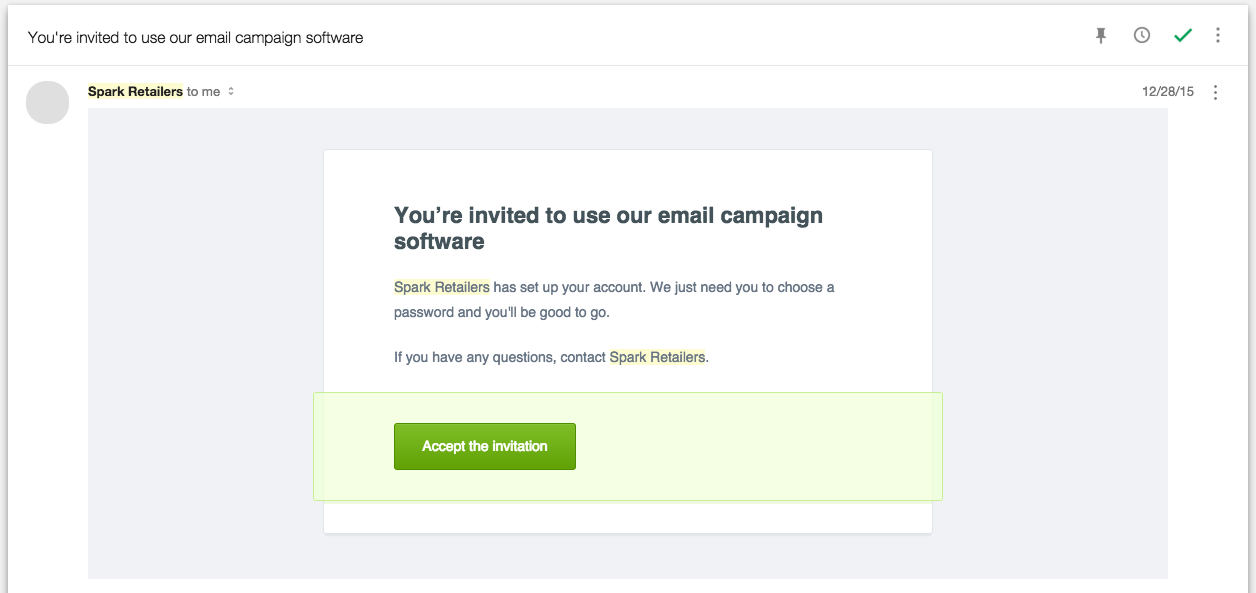
Click the Accept the invitation button and proceed to create a login and password. Once you’ve filled in the required fields, you’ll drop right into the software.
 SETUP YOUR CAMPAIGN
Define the campaign and sender details
Open Campaigns and click Get started (or Create a new campaign). Then follow the on-screen instructions to set up a Regular campaign, as shown here:

When you’ve filled in the campaign details, click Next. You can come back to this page later if you need to change anything.
 SELECT THE CAMPAIGN FORMAT
There are a couple of formats you can choose for your campaign, as explained below.
Template library
You can select a design from the template library, pictured below, then customize it to suit your brand using our email builder.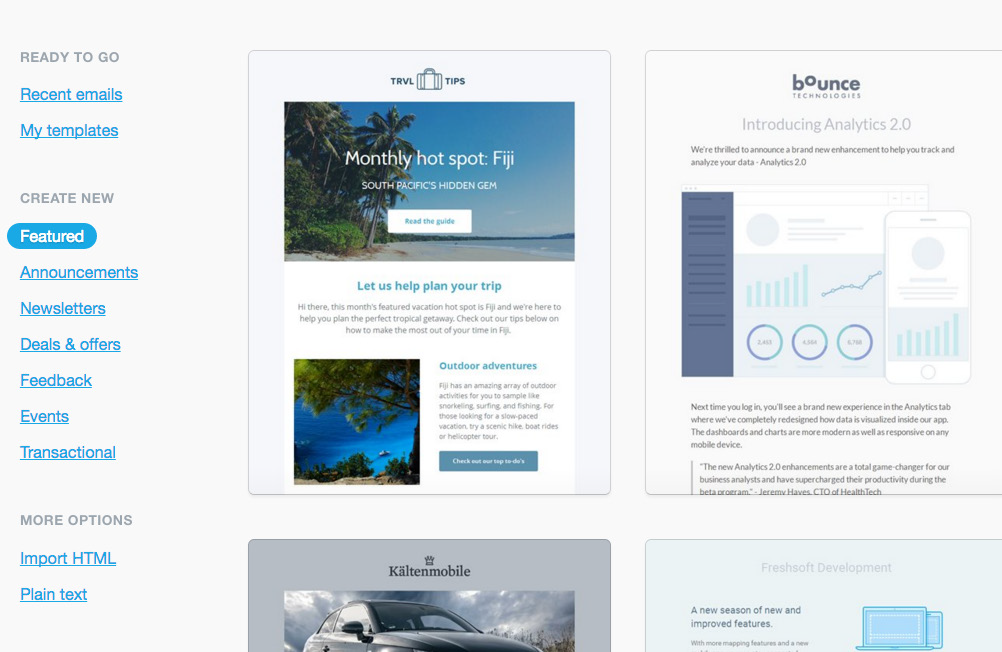
After you choose a design and customize it, your custom template will be saved to use again next time. Sent campaigns are also saved so you can use them as a starting point for the next email.
Import HTML
If you already have a complete HTML email — designed externally and ready to send — select
Import HTML, in the left sidebar, to upload it from your computer or the web.
Plain text
You also have the option to select Plain text, in the left sidebar. Plain text emails are good for nonmarketing- related content, or maybe to give your email a more personal feel. However, because they are text-only emails containing no HTML, only basic reporting is available.
 CHOOSE RECIPIENTS
When your campaign content is ready click Define recipients. If you’ve already set up one or more subscriber lists they will be available under Current lists, as shown here:
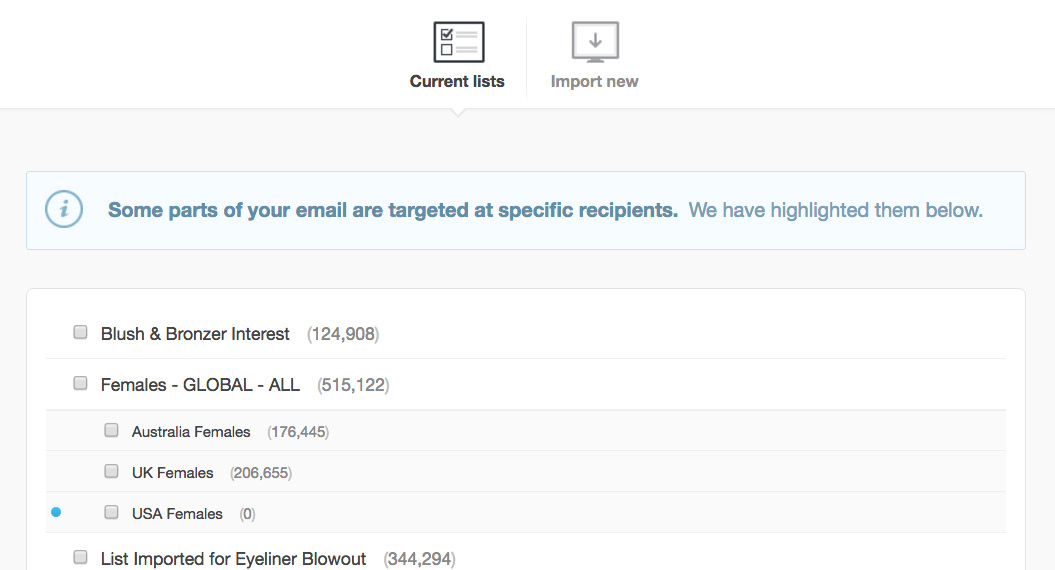
If there are no lists you’ll be prompted to add new subscribers by typing them in or importing a file.
You can also create a new subscriber list on the spot by clicking Import new. Adding subscribers like this will automatically create a new list for you. It will be saved in Lists & Subscribers and called: List Imported for . You can change the list name and type later.
Click Next when you’re done.
 REVIEW THE CAMPAIGN SNAPSHOT
To double-check everything you’ve set up so far, we summarize it for you in a campaign snapshot. To change something just click the the Edit buttons on your right:

It’s a good idea while you’re here to check the plain text version of your email, because what looks great as HTML might need adjusting for text-only.
If you’re ready to send your campaign, click Schedule delivery. However, a best practice is to send a test email by clicking Send a test.
 TEST YOUR CAMPAIGN
A Quick test allows you to send your campaign to up to five email addresses at no cost. Use this to send the campaign to yourself or colleagues for proofreading, and to make sure everything looks as expected design-wise.
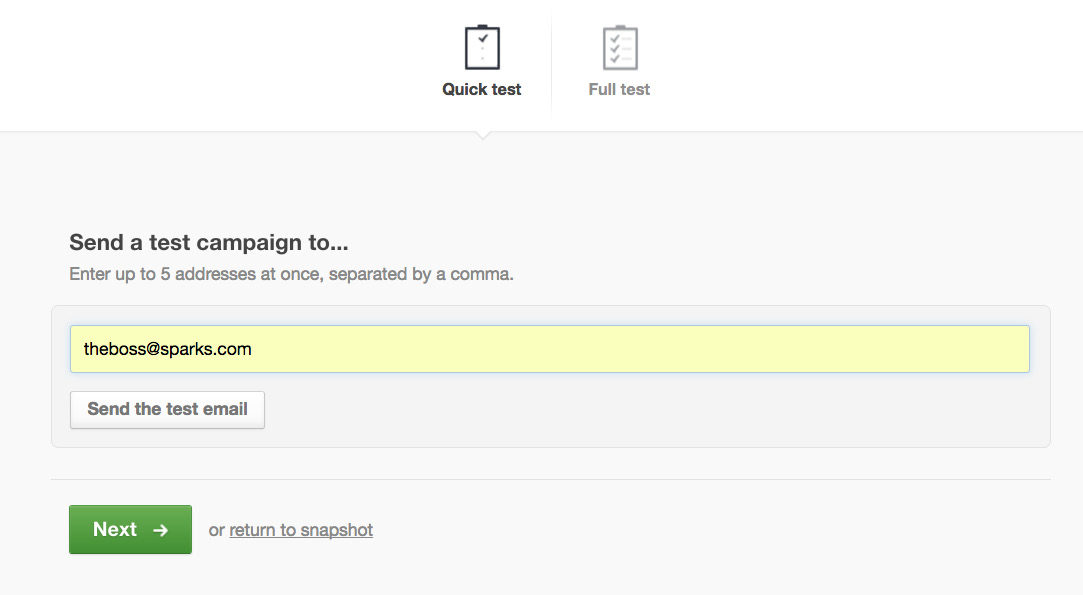
There’s also a fully automated design and spam test that you can run for a small fee.
Click Full test to see a sample test and optionally run your own.
If you want to send a test, click Send the test email. If you wish to proceed without the test, click Next.
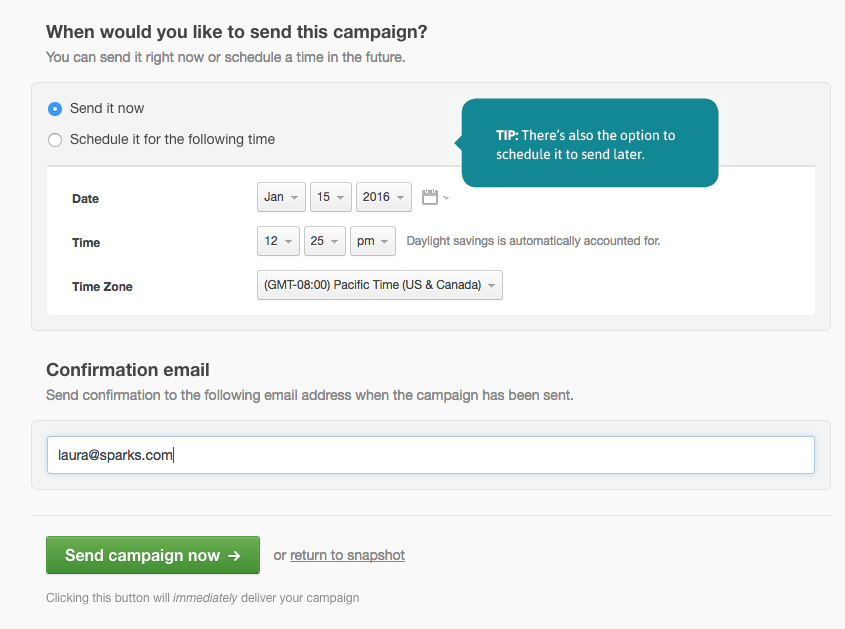
 SEND NOW OR SCHEDULE FOR LATER
If you’re sending a free trial campaign (to five people or less) click Send campaign now, as shown here:
 VIEW CAMPAIGN REPORTS
Your campaign report shows how many people are opening the email and which links have been clicked, as well as keeping record of bounces, unsubscribes and other important activity.
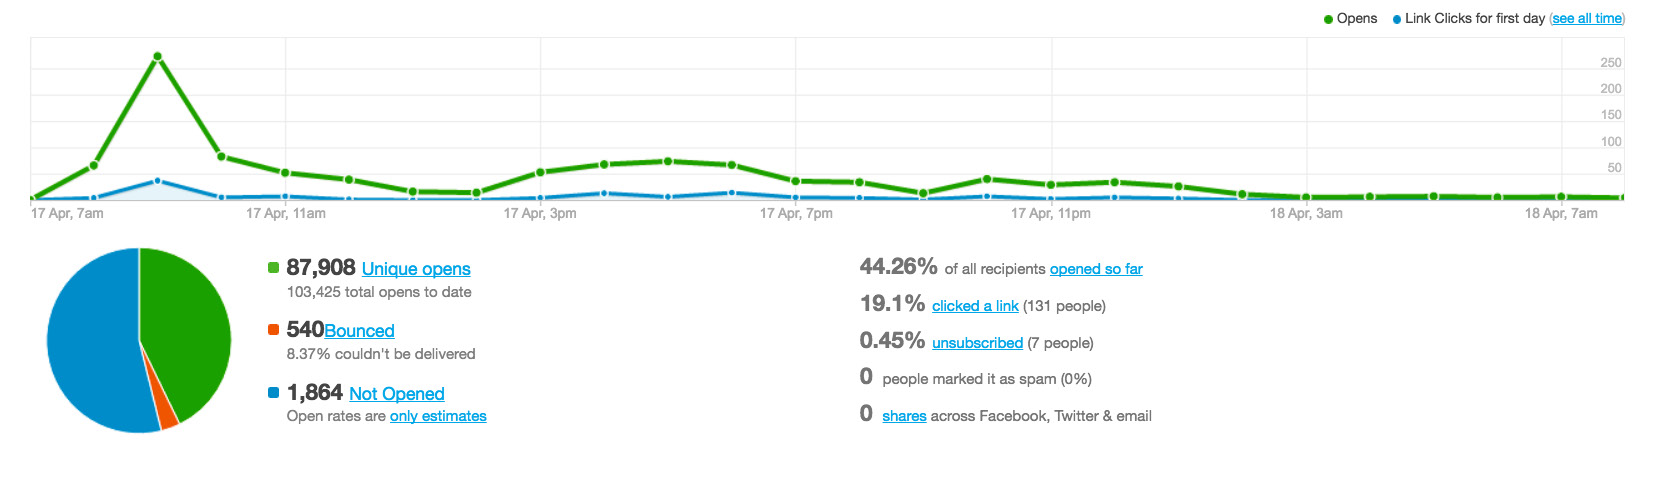
Campaign reports are real-time, so refresh your browser window to see the latest stats and figures instantly.
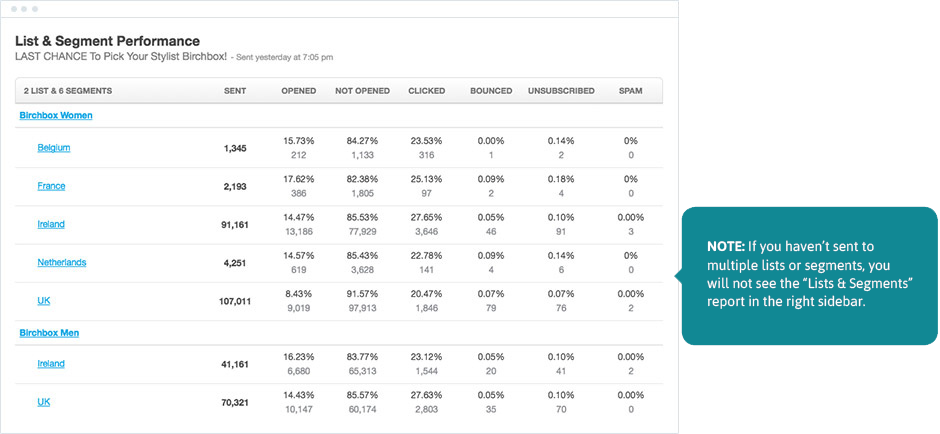
Campaign reporting for segments and multiple lists
If you’ve sent a campaign to multiple subscriber lists, or segments within a list, you can view reporting specific to an individual list or segment. To do this, click Lists & Segments in the right sidebar, or the “lists” link below the campaign name to display individual reports: