How to Master Product Photography on a Tight Budget
Consumers seek time-saving shortcuts all the time, and their attention naturally gravitates to the quickest way to gather information: images.
Product images not only testify to the quality of your product, but also serve as windows into your ecommerce store, creating 2 very important things:
- Transparency
- Trust
Images shape their first impression, creating a tipping point as to whether they will continue browsing and eventually make a purchase.
Here, we’ll show you how to take images that:
- Engage
- Convert
- Boost the lifetime value of your customers.
We’ll also go over how to optimize the photo creation process to save you time and money.
Keep in mind that you don’t need a large budget to create polished and professional product photos.
In fact, we will show you how to do it for about $50.
What is Product Photography?
Product photography uses specific techniques to showcases products in an attractive way and entice potential buyers to purchase specific products.
Product photography is an essential part of both online and offline advertising for successful catalogues, brochures, magazine ads, billboards, online ads and company websites, specifically when selling products direct to consumer.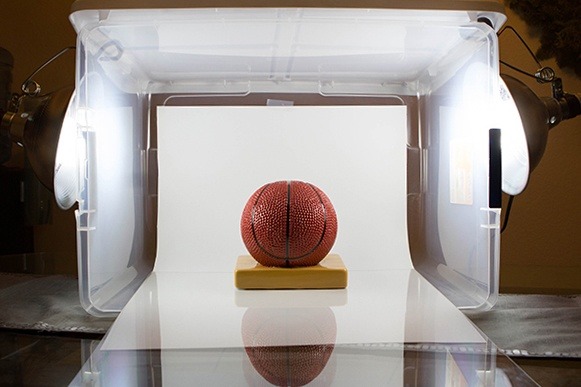
Now, let’s take a closer look at why images are so important.
Why Photography Increases Conversions
90% of information transmitted to our brain is visual.
Photos are a key part of a consumer’s decision-making process, ultimately determining conversion and retention rates.
The quality of a product photo reflects your brand image, creating the infamous first impression.
The key to making the most of their first impression is to present polished, professional images that evoke maximum engagement.
1. Quality visuals enhance every buyer touchpoint.
93% of consumers consider images essential in purchasing decisions. Your images represent your product’s perceived value and quality. They speak directly to your target audience, making your product page and content more relatable.
Take Naturally Curly’s for example. They offer amazing images of simple, everyday products, often making them cool and appealing. Take a look at the product images below. How neat and trustworthy do they look?

Source: Naturally Curly
Again, you don’t need a large budget to create polished and professional product photos. In this guide, we’ll show you how to do it for $50.
2. Images are a key element of branding.
Branding should be central to every decision your company makes, including:
- Your social media posts
- Website updates
- All your marketing efforts.
And images are at the helm of your brand. They are the first to grab attention, instill trust, and invite customers to take a further look.
Your goal is to form long-term relationships with your customers, and photos are one of the most important tools to achieve that.
Seriously Silly Socks does a great job at this. They offer polished but super brand-charged product-only images.
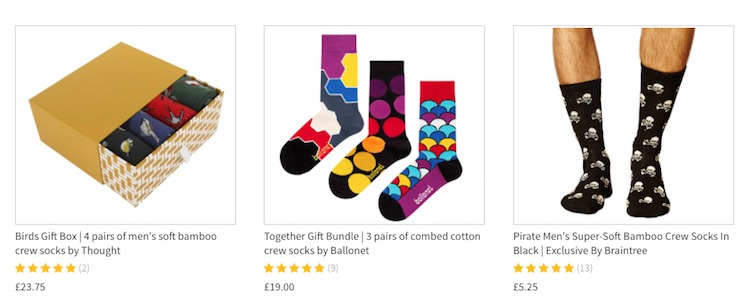
Source: Seriously Silly Socks
The 2 Types of Ecommerce Product Photography
There are two main types of images that should be used on your product page and across your marketing channels.
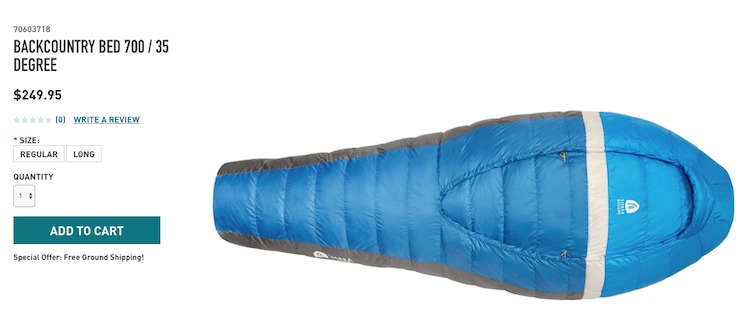
- The first are clean-cut, white background, product-only images. These should include your featured product, and a variety of images showcasing your product from different angles. Below is an example of Sierra Designs’ product-only shot.
- The second is in-context or lifestyle photos that show your product being used in its intended environment or alongside complementing products. Here’s the same product in a lifestyle or in-context shot.

Product-Only Images.
Product-only images are meant to show your product in its best light from all relevant angles.
They are usually shot on a white background, helping to create a consistent look across your product line.
Contrary to what people might assume, you actually need about a dozen images on your product page, not just one or two.
Most of them should be product-only shots, with one or two in-context shots mixed in, designed to create further emotional bonds with your product.
In-Context Images.
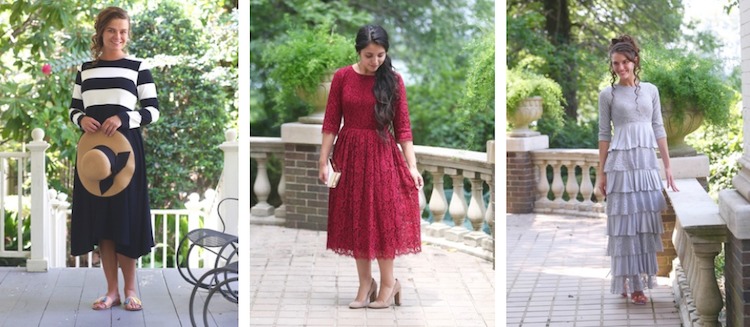
Source: Dainty Jewells
Lifestyle shots, ones that tell a story, are best suited for social media, blog posts, emails, and other marketing channels at the top of your conversion funnel.
The same rules apply to taking lifestyle photos as in product-only shots, apart from the fact that lifestyle photos allow you a lot more creative freedom.
You can use a camera, with or without a tripod, or why not take your products photos outdoors, to a settings that suits your brand’s voice.
For outdoor shoots on a budget, it is best to use natural light.
You can achieve really beautiful results if you shoot early in the morning or in the late afternoon, when the light is filtered at a smaller angle. Whatever choice you make, you should make sure both your hardware and software are top notch. Much like you need the best video editing software when shooting a movie – you need the best camera and setup for photography as well.
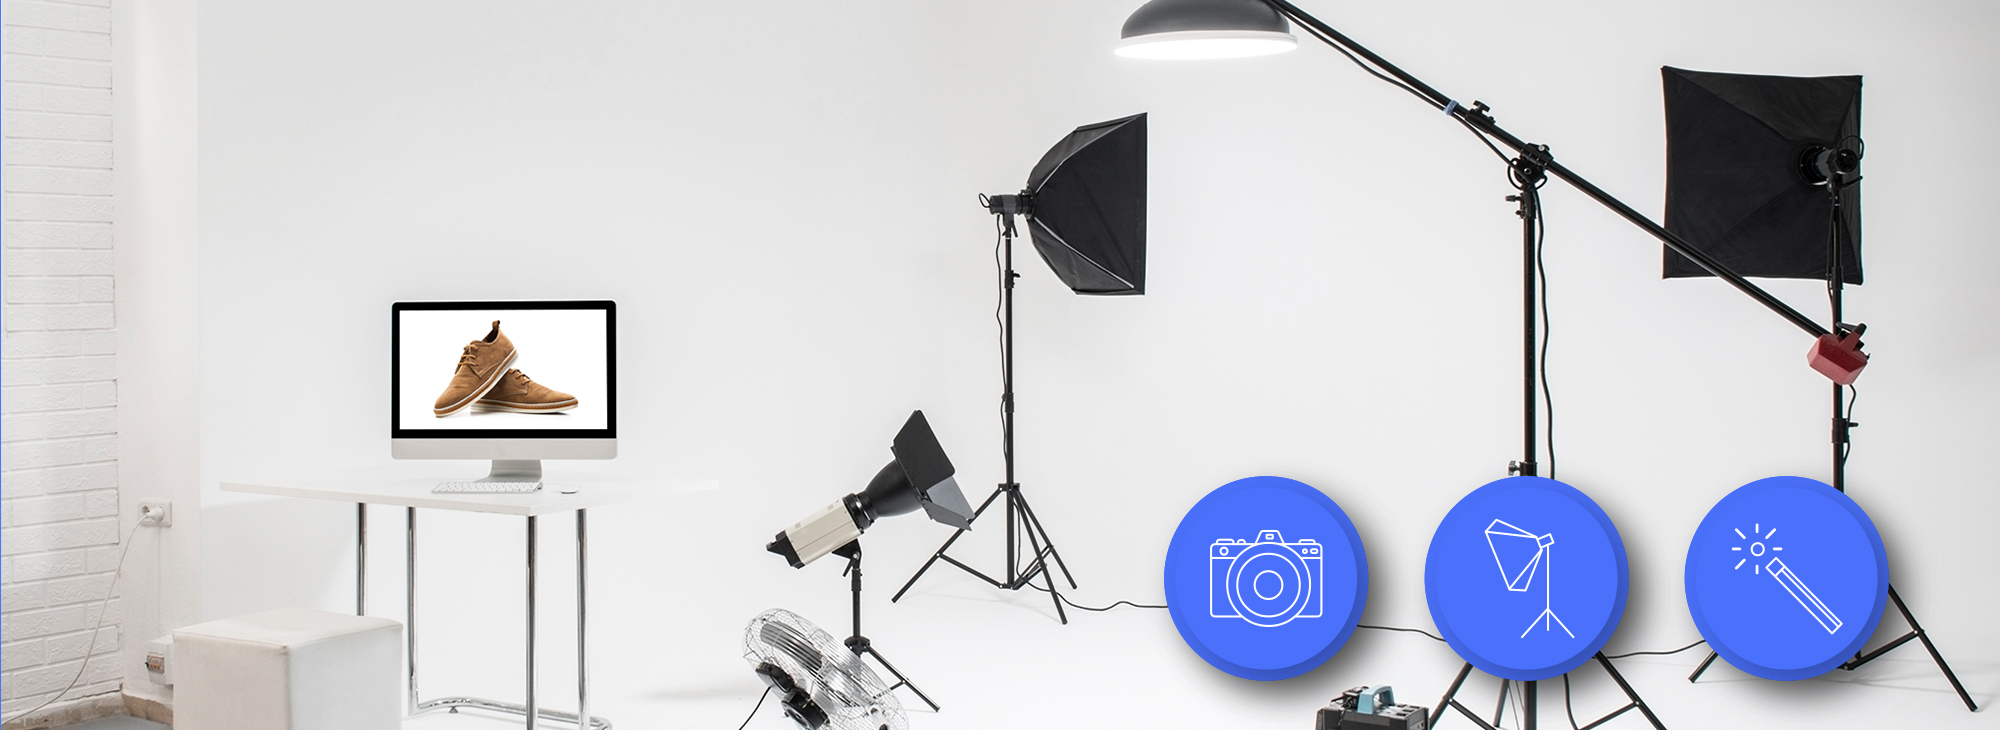
Basic Product Photography Equipment and Process
For those new to photography, your first product shoot may seem overwhelming.
But after a few rounds, each step will become more natural, and you won’t even have to think about it.
The key is to find a process that suits your needs, optimize it, and create a set of guidelines to ensure you keep your images consistent.
Let’s take a look at our DIY product photography tips.
1. Set up your background and product.
Getting the right background is worth the effort, because it simplifies the entire editing process.
There are lots of ways you can improvise a background on a budget, and we will look at two that can be set up for under $20.
- A shooting table: You can create this with a chair you have in your home or office.
- A light tent
Shooting Table.
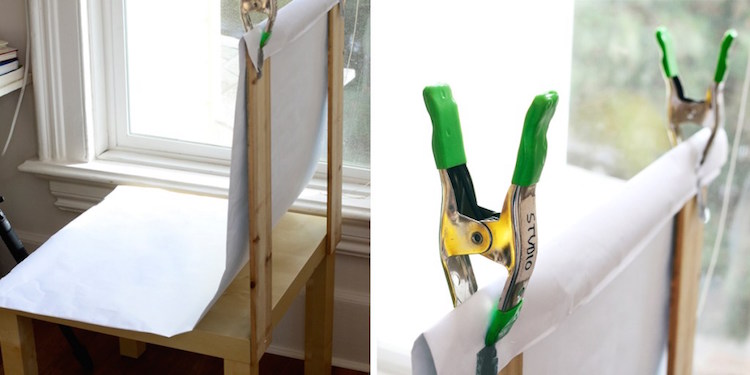
Source: Pixc
The first is a chair mounted sweep. For this, all you need is a roll of craft paper.
The simplest way to achieve this is by pushing a chair against a wall, and taping craft paper on the wall allowing it naturally fall to the ground, creating a seamless transition between the vertical to horizontal plane.
Or you can clip the paper to the top of the chair to improvise a stand for your sweep like the image above.
Light Tent.
The other budget approach is to create your own lightbox, aka light tent.
Here’s how to set one up.
- To get started, you need a plastic storage container that you can put on its side with the lid off.
- Then, tape some white paper to the bottom, and you can also tape white paper or cloth on the sides to serve as diffusers, which helps to distribute the light better, minimizing unnecessary shadows.
- Depending on your budget, you can use artificial lighting and place them either side of the container, or for those on a budget take advantage of natural lighting by placing it your DIY lightbox next to a large window.
Setting up your Product.
It’s important to make sure you set your product up in front of your background on a flat, stable surface.
Once you get the lighting right, you’re almost ready to shoot.
If you’re shooting jewelry, it’s always best to use a bust. Those on a budget can improvise by making one from a piece of cardboard, like in the image below.
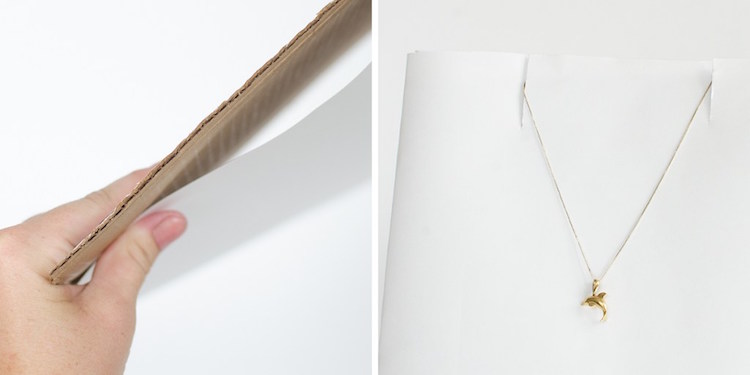
Source: Pixc
You can also use fishing line to suspend earrings and other small items, which is easily removed in the editing process.
Here are a few ideas for harder to photograph items:
- Use glue dots and tape to fix small items in place.
- For clothing, it’s always best to use a mannequin, which can be easily removed.
- You could try experimenting with a hanger or even creative flatlay.
- For lifestyle shots, why not ask a friend or team member to sport your clothes for some bonus photos.

Source: Pixc
If you are shooting large items, like furniture, you will need a stand mounted sweep that might cost a little more.
But you can improvise by getting a few rolls of craft paper, taping them to the wall, and letting gravity do all the work.
This technique follows the same principles as the table mounted sweep, only it’s a bit bigger.
2. Get your lighting right.
If there is one deciding factor that defines the quality of your images, it’s light.
Lighting can be very tedious to set up, but when done right, it brings beautiful results and significantly simplifies your post-processing.
You have 2 options:
- Natural Light: Best if you’ve created a chair mounted sweep.
- Studio Light: Best if you have the budget, or if you create a lightbox.
Natural Light.
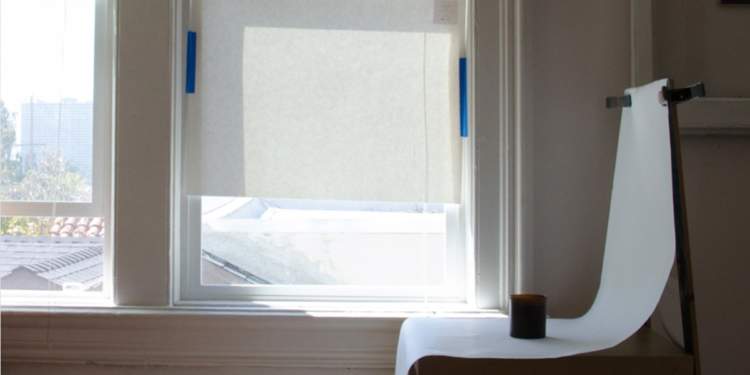
Source: Pixc
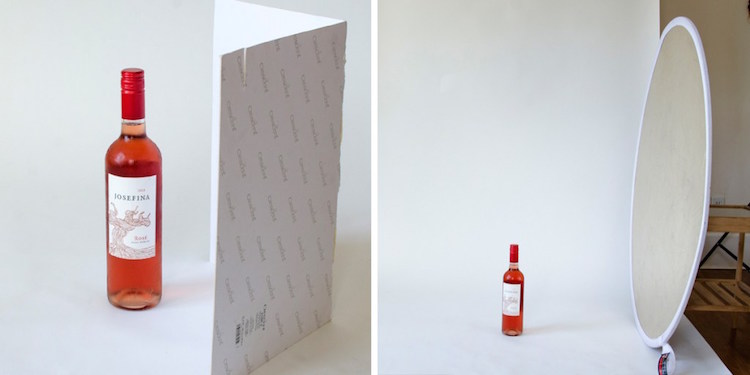
When you’re on a budget, you should use natural light. It’s much easier to manipulate, and, for small in-house product shoots, it can save you lots of time and hassle. If the light is too harsh, you can diffuse it by placing a cloth or white paper over the window (see image above).
If the shadows are too harsh, use white plasterboard or cardboard on either side of the object, helping to reflect some light and soften it. It’s always best to shoot when the day is at its brightest, giving you more light to play with.
Source: Pixc
Better to have too much sunlight and minimize it, than not enough. It’s very hard to create great lighting during the editing process. But keep in mind never to shoot under direct sunlight. Just like a strong backlight, direct light can create harsh shadows.
Studio Lights.
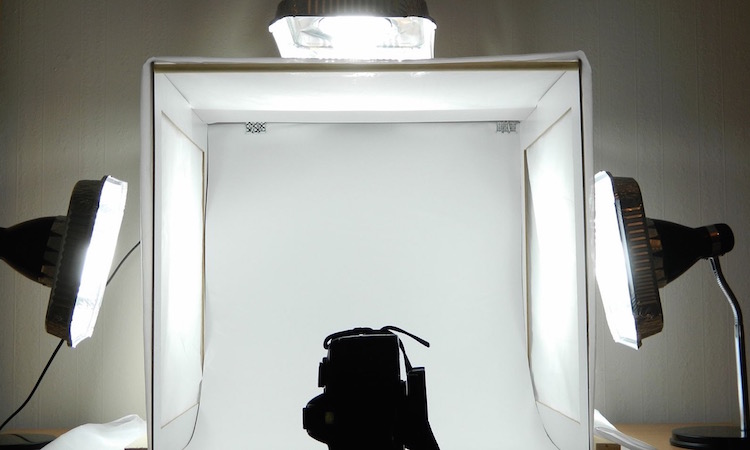
Source: arqspin
If you have to use artificial lighting, you will need at least two softbox light setups to get the shadows right. One of the lights should serve as your key light, and the other as your fill light or backlight, depending on your desired results.
Consider placing some white paper or cloth over them to diffuse some of the light, helping to achieve softer shadows.
Your key light should be placed in front — often slightly to the side — of the product, while your fill or backlight is on the opposite side, back or above.
Manipulate the angles and distance of the lights until you get soft, evenly distributed shadows. You can also use white plasterboard or cardboard to defuse some of the light and further soften those shadows.
With that in mind, studio lights give you more control over the entire process, especially if you are shooting multiple products over several hours. Once you have the right setup, you can get consistent, professional results and recreate them for all your shoots.
3. Use a tripod.
Tripods bring consistency, stability, and focus. It is easy to end up with blurry images when you try to get your entire product in focus, while holding your camera in your hand without moving.
A decent tripod will serve you well for many years, and you should be able to get one for under $30. It’s definitely worth picking on up when you have some budget.
If you’re using a camera, set it to a low aperture (AKA a high f/stop), and slow shutter speed. That way you will get a wide depth of field, keeping your entire product in focus, leaving your products looking crisp. It’s vital to stabilize your camera when you are shooting with a wide depth of field in order to avoid blurry images.
4. Pick the right camera.
Source: Pixc
It is the most essential element to any product photography shoot: a camera. Prices of DSLR and point and shoot cameras have steadily dropped over recent years.
Recommended DSLR Settings for Product Photography:
- Don’t use a wide angle lens. You will distort your product.
- Use the right aperture for the right shot. A wide aperture like f2.8 or f4.5 will narrow your depth of field, leaving parts of your product out of focus. A small aperture like f8 or f11 will give you a wider depth of field, keeping your entire product crisp and in focus.
- Use the correct white balance. When shooting, you should set it to the same Kelvin temperature as your lights.
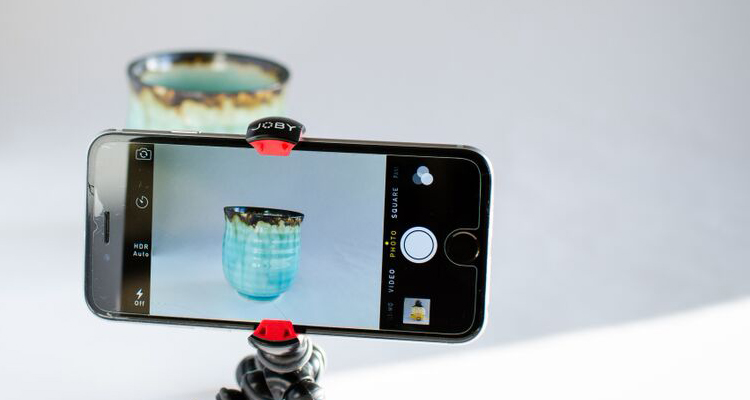
Smartphone camera technology has come a long way and sometimes you can take even better pictures than you might using a professional camera. So as long as you get your lighting and background right, your iPhone or Samsung device can do a good job.
You might want to get a smartphone stabilizer or tripod, like Joby, at some point to help reduce blur and speed up post-processing.
5. Don’t forget post-processing.
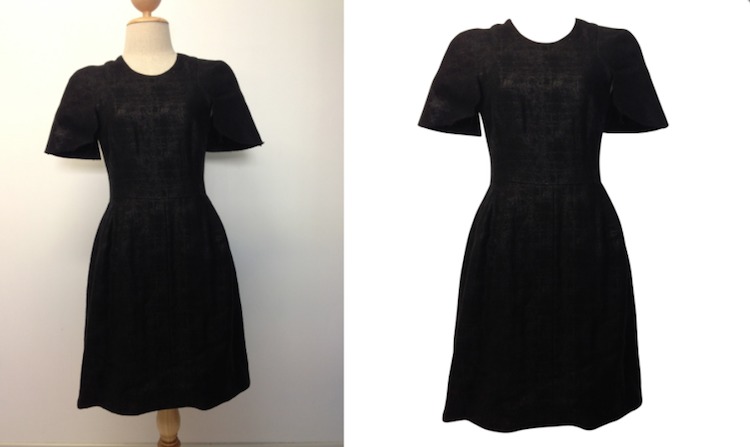
Source: Pixc
Retouching your images after the shoot is vital to achieving a polished look. For those starting out, getting the background or the lighting right takes a bit of trial and error. Thankfully photo editing software can make a multitude of flaws magically disappear.
Retouching covers anything from background removal to color correction, mannequin removal, and shadow addition for a more natural look. Photo editing is a time-consuming process, especially until you get the hang of things.
Examples of Free Image Editing Tools:
- Pixlr – Free and has a lot of the functionality of Photoshop.
- Canva – User-friendly free online editor best suited for marketing materials.
- Fotor – Free, easy-to-use smartphone app.
- Snapseed – Powerful, fully-featured mobile app that is also free.
How to Create Product Photography Guidelines
Once you have the process down to a fine art, make sure you take the time to create clear shooting, brand, and editing guidelines so you can maintain consistency as your business grows.
Make sure you document all the minor things, including things like the distance between the camera and product, angles, and lighting setup. Trust me, it’s worth the effort in the long run. Keep in mind that your product photos are basically brand ambassadors, and maintaining consistency is crucial.
Create a technical guide and a template in your photo editing software that will help you maintain consistent size and scale. Go a step further and create a style guide for your in-context snaps too.
Make sure you include:
- Color Palette
- Saturation
- Focal Length
- Shadows
- Composition
- Location and Context
- Consistency
Share your guide with everyone involved in your product shoots, and post a copy in your in-house studio for quick reference. Having an image guide will not only save you money in the long run, but also save you lots of time as you won’t have to repeat the training processes.
Instead, you can focus on more profitable tasks, such as growing your business.
Optimizing Your Images (and Increasing SEO)
Source: Envira Gallery
Don’t forget to optimize your images so you get the best quality possible, while also making sure you don’t reduce page load speed. Most platforms and marketplaces have their own set of photo editing requirements, so make sure you find out what yours are.
Make sure you implement free minifying tools to optimize your images, and shave off a few unnecessary kilobytes.
Finally, always make sure you name your images correctly, including as much relevant metadata and keywords as possible.
This additional detail helps search engines understand what is in the image, helping to improve your ranking giving you boost in organic traffic.
All The Tools You Need to Get It Done (<$50)
The world of ecommerce is showing no sign of slowing down, and your product photos provide prospective customers a virtual window into your business.
There’s no doubt about it, visual content plays a huge part in online purchasing decisions.
To stand out, create polished, consistent images across your product pages and marketing channels.
Make sure you choose images that fortify your brand, as this will help boost conversions and ultimately sales.
Once you master the lighting, background, and editing process, you’ll be on your way to product photography perfection!
Here are all the tools mentioned in here to get it done.
- A shooting table.
- A light tent.
- Studio light.
- A tripod.
- A camera (or your smartphone!).
- Image editing tools.
- Pixar.
- Canva.
- Motor.
- Snapseed.
- Pixc.
- Photography guidelines for consistency.
This wonderful article was written by Rachel Jacobs who gave us permission to share with you. We hope that you found this very informative and useful in your product photography journey.
Recent Posts
-
Google My Business and Your Business
What is Google My Business and why do you need to be using it for your business?The days of sm …Nov 12th 2020 -
6 ideas to help craft your next social post
Even the most accomplished writers get blocked. What can help is to follow a framework that is trie …Oct 22nd 2020 -
How to Master Product Photography on a Tight Budget
Consumers seek time-saving shortcuts all the time, and their attention naturally gravitates to the q …Oct 16th 2020